Introduction
Reverb mixing mistakes can turn an otherwise great audio mix into a muddy, unprofessional mess. Reverb is a wonderful effect when used properly. However, there are many common reverb mixing mistakes I’ve observed, especially in church sound systems. My goal with this article is to identify these reverb mixing mistakes and show you how to fix them to get the most out of this essential effect.
The importance of reverb in creating spatial dimension
Reverb adds space and depth to the sound and your overall mix. Taking and otherwise dry uninspiring audio and adding realism back into it. Though the effect has been around for decades, it has become particularly important in live worship services. In today’s digital age, audio is typically captured in a direct and dry fashion. The controlled nature of the recorded audio is unnatural to listen to. Reverb provides the spatial dimension needed to make audio pleasing and engaging.
Understanding the importance of reverb helps highlight why these reverb mixing mistakes can be so detrimental to your church’s sound. This is especially relevant as more churches install acoustic treatment in their sanctuaries, making spaces increasingly dry and creating a need for artificial reverb to restore warmth and dimension.
How reverb affects the emotional impact of a mix
Beyond providing dimensional space, reverb can affect the emotional response of listeners. The right reverb can move someone into a contemplative mood or draws people in that enhances their personal worship.
With various reverb types available – Short Hall, Cathedral, Plate, Tile, and more – each with unique characteristics, the creative possibilities are nearly endless. As a guitar player myself, I understand how deep this rabbit hole goes.
As audio engineers, when we’re connecting with the music, we often want to enhance the emotional impact by making sounds bigger and more immersive. As we’ll see, many reverb mixing mistakes stem from well-intentioned attempts to create emotional impact without understanding the technical aspects.
6 Common Reverb Mixing Mistakes and How to Fix Them
Even with all the benefits reverb provides, improper application can seriously compromise your mix. The most common reverb mixing mistakes I observe in church settings include:
- Overuse of reverb
- Poor reverb selection
- Incorrect reverb settings
- Neglecting reverb EQ
- Static usage throughout a service
- Improper stereo imaging
Let’s examine each of these reverb mixing mistakes and discuss practical solutions.
Fundamental Concepts
Before diving into specific reverb mixing mistakes, let’s establish a foundation of reverb fundamentals that will help you understand how to avoid these issues.
Types of Reverb
There are too many reverb types to list them all but the most common are: Hall, Chamber, Room, Plate & Spring, etc. As well as many variations within each reverb type. Sweetwater wrote an article about these types of reverbs if you want to take a read here. Here is a brief description of each type I mentioned:
- Hall reverbs replicate the sound of a concert hall
- Chamber reverbs are similar to halls, but provide a little more clarity
- Room reverbs aim to replicate a natural reverb you would hear within a room
- Plate reverbs was one of the first types of artificial reverb. This was originally produced using a magnetic driver to produce vibrations in a large sheet of metal
- Spring reverbs are produced in a similar fashion as Plate but it uses a metal spring instead of sheets of metal
Reverb Parameters
To make matters more confusing, each reverb will have different parameters. There is a great article from Avid that goes in depth about reverb if you want to read that here, but I will provide a brief description of the common reverb parameters you may encounter. Understanding these parameters is essential for avoiding reverb mixing mistakes, as improper settings can quickly ruin an otherwise good mix
- Decay Time, also known as reverb time or tail, is the duration it takes for the reverb to fade away. A longer decay time will result in a larger and more spacious sounding reverb, while a shorter decay time creates a tighter and more intimate ambiance.
- Pre-Delay is the delay between the original sound and the reverb effect kicks in. Shorter pre-delay times create a more immediate connection between the sound and its reverb, suggesting a smaller room. On the other hand, longer pre-delay times give the impression of a larger room.
- The Size parameter adjusts the perceived size of the virtual space created by the reverb.
- Diffusion affects the dispersion of echoes in a reverb, determining whether they merge smoothly or stand out as individual reflections. At high diffusion settings blends reverb tail to simulate an acoustically treated spaces. Low diffusion settings result in more discernible echoes, resembling reflective spaces such as stone chambers or caves.
- Density controls the concentration of echoes within the reverb decay. Higher density settings produce a thicker and more sustained reverb, suitable for creating a lush backdrop, while lower density can add a sense of granularity and space between reflections.
- Damping refers to how the high frequencies within the reverb decay over time. Higher settings reduces the higher frequencies while lower settings retains those frequencies.
- EQ within a reverb effect allows you to shape the frequencies of the reverb effect.
- Spread, or stereo width, controls how wide the reverb appears in the stereo field.
- Modulation within reverb adds variation to the pitch or time of the reverb tail, contributing to a more complex and lively sound.
- The Wet/Dry Mix controls the balance between the unaffected ‘dry’ signal and the processed ‘wet’ reverb signal.
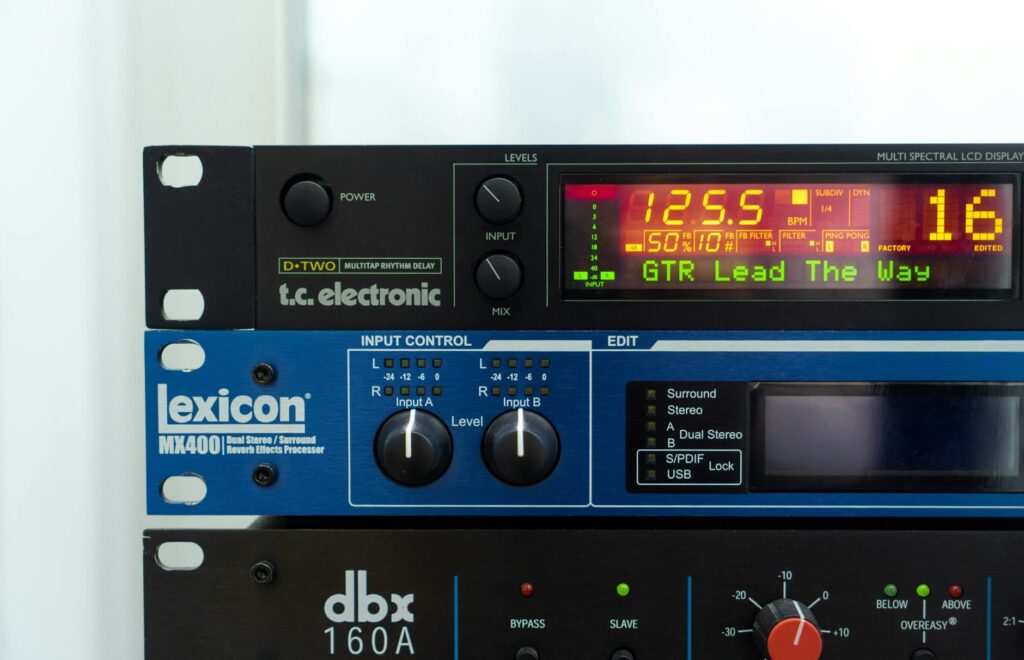
Digital vs. hardware reverbs: key differences
The last thing I’ll mention is that when it comes to reverb, you’ll encounter both digital and analog options. Most church engineers will primarily work with digital reverbs in their consoles and DAWs. While many digital reverbs are original designs, many are actually recreations of classic analog units. A common reverb mixing mistake is not understanding the fundamental differences between these two approaches:
- Analog reverbs generate reflections through physical mechanisms like springs or plates, creating their characteristic sound through actual acoustic properties.
- Digital reverbs, meanwhile, use mathematical algorithms to simulate these same effects, offering greater flexibility and control but sometimes lacking the organic character and unpredictable nuances that make analog reverbs special.
Understanding these differences can help you select the right tool for your specific mixing needs and avoid the mistake of using digital emulations without accounting for their unique characteristics.
Reverb Mixing Mistake #1: Overusing Reverb
Overusing reverb is perhaps the most common reverb mixing mistake I encounter in church settings. There have been so many instances where the music starts up or one of the singers is talking in a quieter moment and they are drowning in reverb. The audience can hear it and that is all they can think about.
I think part of the reason that there is so much reverb is because it does soften the harshness that is inherent in unprocessed or lightly processed audio. Maybe the vocalist is pitchy that day or the guitars are too dry, or you heard the long tail of a shotgun snare and you want to duplicate that.
When we use too much reverb, you lose clarity and your mixes end up being muddy and you lose the punch. By using too much reverb, you take the attention away from the song and the moment. It becomes a distraction. We need to remember that ‘less is more’ when it comes to using reverb. So how can we solve this problem but still have a great mix? Here are some best practices for using reverb:
Use less reverb than you think you need
When you are mixing during rehearsal, turn off all effects. You might be surprised at how little you actually need. You could also mix with your headphones so you can get a better understanding of how the reverb is affecting your mix.
The “mute test” for reverb effectiveness
The next step is to use the “mute test” method. When you are adding reverb back into your mix, we want to get a minimal baseline that would be good if you left it on all the time (Later, I will talk about why you should never just set the reverb and forget it).
- Increase the reverb until you start to notice it
- Bring it down until you feel like you can barely hear it
- Toggle the mute on/off with the reverb and see if you can tell the difference
- Once you get it to a place where you don’t notice the effect but you can tell something is missing when you turn it off.
By establishing this minimum reverb level, you’ll avoid the common reverb mixing mistake of drowning your worship mix in excessive ambience.
Reverb Mixing Mistake #2: Inappropriate Reverb Selection
The next common reverb mixing mistake has to do with inappropriate reverb selections. Use the wrong reverb can create sonic conflicts, muddy your mix, and destroy the clarity you’re trying to achieve.
Putting a heavy long reverb on an electric guitar that is already using heavy reverbs in his rig is not a good idea. Understanding the tones your musicians are giving you will help you determine which reverb is appropriate for your setting. Although the choices are seemingly endless, there are few reverbs that will work in 90% of all music and are commonly used in the industry.
Building a reverb palette for different purposes
- Short Room Reverb for the generic “room” sound for all of your audio creates a more cohesive mix
- Long Plate Reverb for the drums, mostly the snare and toms, which helps drive the impact of the drums
- Medium Hall Reverb for your vocalists to create bigger impact and soften the attack
By building this basic reverb palette, you’ll avoid the common reverb mixing mistake of using inappropriate effects and create a more cohesive worship sound.
Reverb Mixing Mistake #3: Poor Reverb Parameter Settings
Poor reverb settings represent another common reverb mixing mistake I frequently encounter in church sound systems. If the reverb is not set up properly, it will cloud the main/dry audio taking away the attack on impact of the singer or instrument.
For example, if there is too much reverb on a snare, then you mostly will hear the reverb effect of the snare hit but won’t feel the impact. It will push the snare back in the mix. This issue can also make your mix sound disjointed and muddy. To fix the problem we need to adjust the parameters a bit. You also need to select the right type of reverb (section above)
Pre-Delay issues and solutions
As a general rule, having a Pre-Delay of 50ms will be sufficient to allow the attack on any instrument through before the reverb kicks in. It is also quick enough to blend with most song tempos you will encounter in church settings. Having a common reverb for all of your instruments will help make your mixes more cohesive.
Decay time issues and solutions
The type of reverb plays into this as well, but if you have a reverb that has a longer decay time, you will need to adjust how much you are introducing the reverb into the mix. Get the reverb out of the way before the next beat or lyric so the reverb is not clouding the mix.
Instrument-specific recommendations
You may want to have different pre-delay times depending on the instrument(s). For instance, you could use a 20ms on vocals, 30ms on guitars, and 50ms on drums. This will bring in some variety to your mixes. It would be more difficult to have different reverbs of different instruments on a budget console, but if you have the capability, then these pre-delay settings are a good place to start.
By optimizing your pre-delay and decay settings, you’ll avoid the reverb mixing mistake of poor parameter configuration and maintain the clarity and impact of your worship mix.
Reverb Mixing Mistake #4: Neglecting EQ on Reverb
Another reverb mixing mistake that plagues church audio is neglecting EQ on reverb returns. You need to adjust the EQ parameters to make it blend with the music. If you don’t shape the tone of the EQ, the more likely it is going to get in the way of certain frequencies within your mix. Part of the issue is not knowing what you want your reverb to sound like and defining the purpose of the reverb. Here are some principles you can use with your reverbs.
High-pass and low-pass filtering techniques
For a general-purpose reverb to put on the whole mix, consider using:
- High-pass up to 400Hz
- Low-pass down to 2kHz
- Reduce 500Hz-800Hz slightly
Dark Reverbs
Use a Low-pass down to 2k or below will be a dark reverb. The EQ setting will also make the sound heavy but pushed back in the mix. Use this if you want a heavy sounding reverb such as on a vocal.
Bright Reverbs
Pull back on the Low-pass filter so you can get the bright airy reverb in your mixes. Be careful not to use too much, because it will be noticeable, but with the right blend, it can add a lot of energy to the mix. Typically works well for drums and a secondary vocal reverb
By properly EQing your reverb effects, you’ll avoid this common reverb mixing mistake and create cleaner, more professional-sounding worship mixes.
Reverb Mixing Mistake #5: Static Reverb
The “set it and forget it” method is a very common issue with reverb. Just like anything in music (or life in general), you don’t want something that is static throughout the whole song. A good song has variety in it. This should include how we use reverbs.
The majority of churches I have interacted with, typically uses two reverbs. One for vocals and one for drums. Let’s talk about how we could utilize these two reverbs in a typical worship service.
The missed opportunity of dynamic reverb
Reverb can be such a powerful tool within a mix. By not adjusting the reverb with the music, you are creating a flat, uninteresting spatial landscapes. Reverb can really enhance the emotional experience of a song.
- Verse/Chorus Contrast: Use shorter, tighter reverb during verses to maintain clarity and intimacy, then switch to longer, more expansive reverb during choruses to create a sense of lift and magnitude. Another way is to lower and raise the fader levels between each section.
- Bridge Moments: During bridge sections, which often serve as emotional peaks in worship songs, consider using a completely different reverb character or lower the fader and gradually increase the amount to emphasize this special moment.
- Instrumental Sections: For instrumental breaks or solos, increasing reverb can help these moments stand out and feel more expansive.
- Prayer Moments: During spontaneous or planned prayer sections, a subtle increase in reverb can create a sense of sacred space and contemplation. Make sure it actually fits the moment.
- Practical Implementation: On digital consoles, you can assign reverb parameters to accessible faders or knobs for quick adjustments. Even on simpler boards, having a “reverb plan” for each song section will improve your mix.
Dynamic reverb use follows the natural emotional arc of worship, supporting the congregation’s journey rather than just creating a static sonic backdrop.
Building and releasing tension with reverb
- Push the reverb a little more when the song builds and pull it back in lower dynamic parts of the song. This allows the people to feel tension and release
- Keep the reverb low during fast songs. This lets the song to be tight and punchy
- If there’s at least 1-2 beats in between lyrical phrases, you can push the reverb up then bring it down before the next phrase starts. This fills in the space in between phrases
- Find opportunities to increase the Snare reverb on every other hit
These are just a few examples on how to use reverb in a more dynamic way. Selecting the correct reverb type and parameters is one piece of the equation, but you need to know how to use the reverb. This does take some experimentation to master.
By using reverb dynamically with the song adds an extra element to the song that can enhance the experience and brings the song to the next level. Avoiding this common reverb mixing mistake of static application will add professional polish and emotional depth to your worship mix.
Reverb Mixing Mistake #6: Stereo Image Issues
Proper stereo imaging is crucial when applying reverb in your mix. Many sound engineers overlook this part and don’t fully understand how stereo reverb affects the overall soundstage, leading to issues with clarity, phase problems, and poor mono compatibility. These problems become particularly noticeable when your mix is played through different systems or when listeners are positioned off-center.
Mono vs. Stereo Reverb Considerations
Reverb can dramatically affect the stereo image of your mix in ways that aren’t always obvious:
- Stereo reverb creates a sense of space and width, making the mix feel more immersive and three-dimensional. However, it can also create phase issues if not mixed properly
- Mono reverb provides depth without widening the stereo field. It maintains focus and clarity, especially on center-panned elements like lead vocals and snare drum
- Stereo spread settings on reverbs determine how wide the effect appears in the stereo field. Excessive spread can push important elements too far to the sides, compromising the focus of your mix.
Phase Problems and Mono Compatibility
Phase issues with reverb can be particularly problematic in church settings where:
- Some congregation members might be seated far to one side of the sanctuary
- The main mix may be distributed to various zones, including mono systems
- Recordings may be shared online where they’ll be played on different devices
When stereo reverb collapses to mono, phase cancellations can cause the reverb to partially or completely disappear, dramatically altering how your mix sounds. This is especially noticeable with heavily modulated reverbs that rely on phase differences between channels.
Immersive Audio Issues
We are in the beginning stages of immersive or surround sound in audio production. There will be new reverb mixing issues with surround sound. Surround sound will introduce phasing issues with reverbs that are designed for two-channel stereo imaging. I have talked to a few guitar players that have mentioned that there the tone of their stereo effects changes within the 360 environment.
There is a lot to learn since this is a relatively new and probably won’t be widely available on budget consoles for a few years, but it is coming. Placing audio sources in the wrong space in the spatial field could have drastic side affects in your mix.
Solutions for Better Stereo Reverb
There are a couple of ways to solve phasing issues with reverb:
- Setup your reverb in an aux channel that can receive audio for the main input channels. This will allow you to blend the appropriate amount of reverb in the mix. Having a separate aux channel allows greater flexibility like what I mention in 5 Reasons Why You Need To Use Bus Processing article.
- Use different types of reverbs within your mix. Using a Hall for vocals, Plate for drums, and Room for the whole band will add different reverb flavors and decrease the probability of phasing. You can run all of the reverbs in a single DCA so you can control all of them at the same time.
This approach ensures that the most important elements stay clear in the center while still creating an immersive stereo experience. Stereo reverbs generally make the mix sound wider and more spacious. However, mono reverb can make the audio more focused, though it can quickly become overwhelming if applied too heavily.
By implementing these solutions, you’ll avoid the common reverb mixing mistakes related to stereo imaging.
Conclusion
Reverb is far more than just an effect—it’s a powerful tool that shapes the emotional and spiritual impact of your worship experience. By avoiding these six common reverb mixing mistakes, you’ll create clearer, more professional, and more engaging mixes that enhance rather than distract from worship.
Remember that great reverb isn’t about following rigid rules but developing an intentional approach. Start by addressing one mistake at a time:
- Dial back the reverb for greater clarity
- Choose the appropriate reverb for the situation
- Optimize your parameter settings, especially pre-delay and decay
- Apply EQ to your reverb returns
- Use reverb dynamically to follow the emotional journey of worship
- Be mindful of stereo imaging to ensure your mix translates everywhere
Don’t wait to transform your church’s sound. This Sunday, arrive 30 minutes early and experiment with just one aspect of your reverb approach. Perhaps reduce the overall wetness, try a different reverb type, or plan dynamic reverb changes for a particular song.
Share this article with your sound team and schedule a focused training session where you can experiment together with these techniques. Small, intentional improvements to your reverb approach will yield noticeable enhancements to your congregation’s worship experience.
Your congregation may not be able to articulate why the sound has improved, but they’ll feel the difference as these reverb mixing mistakes are eliminated and the music becomes more immersive and impactful.
Ready to Transform Your Church’s Sound?
You’ve now identified the specific reverb mixing mistakes that might be holding back your worship experience. But reverb is just one piece of the puzzle when it comes to creating professional, engaging church audio.
Take your church’s sound to the next level with my FREE guide: “5 Simple Steps to Professional Church Broadcast Audio” — a step-by-step approach that hundreds of worship tech teams are using to create clear, powerful, and distraction-free mixes every Sunday.
Join the community of worship tech teams who are creating audio experiences that enhance rather than distract from worship. Your congregation deserves nothing less!